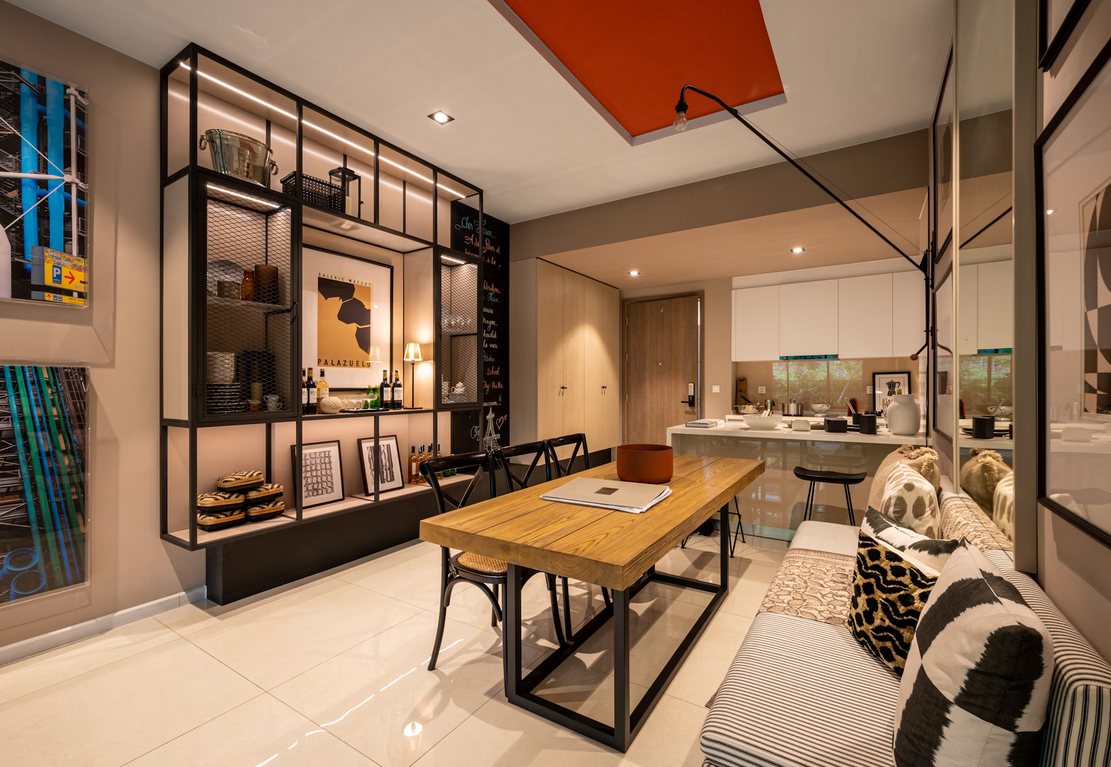
Bathroom upgrades that focus on accessibility and comfort are essential for creating a functional and safe space for individuals of all ages and abilities. Whether you’re renovating a bathroom to accommodate aging in place, catering to specific mobility needs, or simply enhancing comfort and convenience, strategic upgrades can transform your bathroom into a more accessible and enjoyable environment. In this guide, we’ll explore key upgrades and design considerations to improve accessibility and comfort in your bathroom. Subtitles: Accessible Design Elements Comfort-enhancing Features Accessible Design Elements 1. Zero-threshold Showers Install a zero-threshold or curbless shower to eliminate barriers to entry, making it easier for individuals with mobility challenges, seniors, or those using mobility aids such as wheelchairs or walkers to access the shower safely. Tips: Wide Entry: Design the shower entry to be wide enough to accommodate wheelchair access, typically around 36 inches wide. Install a shower bench or seat for added convenience. Non-slip Flooring: Use non-slip flooring materials inside the shower to prevent slips and falls. Choose tiles with textured surfaces or non-slip coatings. Grab Bars and Handrails: Install grab bars and handrails strategically in the shower area for stability and support during bathing. Place bars near the entry, shower bench, and along walls for easy reach. 2. Roll-in Bathtubs Consider installing a roll-in bathtub with a low entry threshold and built-in seating for individuals who prefer or require a bathtub for bathing. Roll-in tubs provide accessibility without the need to step over high thresholds. Tips: Accessible Entry: Choose a bathtub with a low or zero-threshold entry to allow easy access for wheelchairs or mobility aids. Include a sturdy grab bar near the entry for support. Seating and Comfort: Opt for roll-in tubs with built-in seating, comfortable backrests, and adjustable features for a relaxing bathing experience. Ensure the tub design allows for easy transfer from a wheelchair or bench. Safety Features: Install non-slip surfaces inside the bathtub and consider adding handrails or grab bars within reach for added safety and stability. 3. Accessible Sinks and Countertops Modify sink and countertop heights to accommodate individuals of varying heights and mobility levels. Install accessible faucets, lever handles, and space-saving designs for improved usability. Tips: Height Adjustment: Lower sink and countertop heights to accommodate wheelchair users or individuals with limited mobility. Consider adjustable-height sinks for flexibility. Accessible Faucets: Install lever-style faucets or touchless faucets that are easy to operate for individuals with limited dexterity or strength. Ensure faucet controls are within reach from a seated position. Open Space Under Sinks: Provide knee clearance and open space under sinks to accommodate wheelchairs or mobility devices. Use wall-mounted or pedestal sinks for maximum accessibility. Comfort-enhancing Features 1. Universal Design Elements Incorporate universal design principles to make the bathroom accessible and comfortable for everyone, regardless of age or ability. Focus on ease of use, safety, and aesthetics in design choices. Tips: Wide Doorways: Ensure bathroom doorways are wide enough to accommodate wheelchairs or walkers, typically around 32 to 36 inches wide. Use pocket doors or swing-out doors for space-saving solutions. Accessible Lighting: Install bright and well-distributed lighting in the bathroom to improve visibility and reduce shadows. Use motion-sensing lights or adjustable dimmers for convenience. Contrast and Color: Use contrasting colors for walls, floors, and fixtures to aid individuals with low vision or visual impairments. Choose slip-resistant flooring materials in contrasting colors for safety. 2. Comfortable Fixtures and Accessories Upgrade fixtures and accessories for comfort and convenience, including ergonomic designs, adjustable features, and sensory-friendly elements. Tips: Ergonomic Toilets: Install comfort-height toilets with ergonomic seat designs and grab bars for ease of use. Consider bidet attachments or heated seats for added comfort. Shower Controls: Use thermostatic or pressure-balanced shower controls for consistent water temperature and easy adjustment. Include handheld showerheads with adjustable heights for flexibility. Heated Flooring and Towel Bars: Consider installing radiant floor heating or heated towel bars for added comfort, especially in colder climates. Ensure controls are easy to operate and accessible. 3. Smart Technology Integration Integrate smart technology features for added convenience, energy efficiency, and accessibility. Explore options such as voice-activated controls, sensor-based faucets, and automated lighting systems. Tips: Voice-Activated Controls: Install voice-activated devices for controlling lights, faucets, and temperature settings in the bathroom. This technology enhances accessibility and convenience for users with mobility challenges. Sensor-based Fixtures: Use sensor-based faucets, soap dispensers, and toilet flush systems to minimize touchpoints and improve hygiene. Adjust sensitivity levels for optimal performance. Smart Mirrors and Cabinets: Consider smart mirrors with built-in lighting, defogging features, and digital displays for added functionality. Install smart cabinets or organizers with adjustable shelves and lighting. By incorporating accessible design elements, comfort-enhancing features, and smart technology integration, you can create a bathroom that not only meets the needs of individuals with varying abilities but also enhances overall comfort and usability for everyone. Prioritize safety, functionality, and aesthetics in your bathroom upgrades to transform the space into a welcoming and accessible environment.
Upgrading Your Home’s Security: Systems and Features
Enhancing your home’s security is a crucial investment that provides peace of mind, protection, and deterrence against potential threats. With advancements in technology and a wide range of security systems and features available, upgrading your home’s security has never been more accessible and effective. In this guide, we’ll explore the importance of home security upgrades and discuss key systems and features to consider for a comprehensive security plan. Subtitles: The Importance of Home Security Essential Security Systems and Features The Importance of Home Security 1. Protection Against Burglaries and Intrusions Home security upgrades play a vital role in deterring burglaries, break-ins, and unauthorized intrusions. Visible security measures and robust systems act as deterrents, making your home less vulnerable to opportunistic criminals. Tips: Alarm Systems: Install a monitored alarm system that includes door and window sensors, motion detectors, and audible alarms. Consider smart alarm systems with mobile alerts and remote monitoring capabilities. Security Cameras: Install security cameras in strategic locations around your property to monitor entry points, driveways, and outdoor areas. Choose cameras with high-resolution video, night vision, and motion detection features. Access Control: Implement access control measures such as smart locks, keyless entry systems, and video doorbells for secure entry management and visitor verification. 2. Safety and Peace of Mind A well-equipped home security system provides safety and peace of mind for you and your family. Knowing that your home is protected against threats and emergencies allows you to focus on daily activities without worry. Tips: Emergency Response: Connect your security system to emergency response services such as police, fire departments, and medical assistance. Consider professional monitoring services that can dispatch help in case of alarms or emergencies. Carbon Monoxide and Smoke Detection: Integrate carbon monoxide detectors and smoke alarms into your security system for early detection of hazards. Choose interconnected devices that trigger alarms throughout the home for comprehensive safety. Smart Home Integration: Integrate your security system with smart home devices such as thermostats, lights, and sensors for automated responses and energy savings. Use geofencing technology to adjust settings based on your presence or absence. Essential Security Systems and Features 1. Smart Surveillance Systems Invest in smart surveillance systems that provide real-time monitoring, video recording, and remote access. These systems offer advanced features such as motion detection, facial recognition, and cloud storage for footage. Tips: High-Definition Cameras: Choose high-definition (HD) cameras with wide-angle views, night vision, and weatherproof designs for outdoor installations. Position cameras strategically to cover vulnerable areas and blind spots. Wireless Connectivity: Opt for wireless surveillance systems that offer flexible installation options without extensive wiring. Ensure secure encryption protocols and password protection for wireless connections. Cloud Storage: Use cloud-based storage solutions for storing surveillance footage securely and accessing recordings from anywhere. Consider subscription plans with extended storage capacity and additional features. 2. Access Control Systems Implement access control systems to manage entry points, authorize access, and track visitor activity. Access control features enhance security and provide insights into who enters and exits your property. Tips: Smart Locks: Install smart locks on doors and gates that offer keyless entry, remote locking/unlocking, and access codes. Integrate smart locks with your security system for centralized control and monitoring. Video Doorbells: Use video doorbells with two-way audio, motion detection, and live video streaming for visual verification of visitors. Receive alerts on your mobile device and communicate with visitors remotely. Intercom Systems: Install intercom systems with video capabilities at entry points to communicate with visitors and verify identities before granting access. 3. Alarm and Detection Systems Integrate alarm and detection systems that alert you to potential threats such as intrusions, fires, carbon monoxide leaks, and environmental hazards. These systems provide early warnings and prompt responses to emergencies. Tips: Monitored Alarm Systems: Subscribe to monitored alarm services that notify authorities in case of alarms, intrusions, or emergencies. Choose alarm systems with backup power sources and cellular connectivity for reliability. Environmental Sensors: Install environmental sensors for detecting smoke, heat, carbon monoxide, water leaks, and temperature fluctuations. Receive alerts on your smartphone or control panel for immediate action. Panic Buttons: Place panic buttons or duress alarms in discreet locations for activating emergency responses silently in case of threats or intrusions. 4. Lighting and Automation Enhance security with lighting and automation features that improve visibility, deter intruders, and create a lived-in appearance when you’re away from home. Use smart lighting and scheduling options for energy efficiency and security benefits. Tips: Motion-Activated Lights: Install motion-activated lights in outdoor areas, driveways, and entry points to deter intruders and improve visibility at night. Choose adjustable sensitivity levels and timer settings for optimal performance. Timed Lighting: Use timed lighting systems or smart light bulbs that mimic natural patterns and adjust lighting based on your schedule. Program lights to turn on/off automatically to create the illusion of occupancy. Automation Scenes: Create automation scenes that integrate security, lighting, and surveillance systems for synchronized responses. Configure scenes for arming/disarming security systems, adjusting lights, and activating surveillance modes. 5. Integration and Remote Access Opt for security systems that offer integration with mobile apps, voice assistants, and remote access platforms. Remote access allows you to monitor, control, and manage your home’s security from anywhere with internet connectivity. Tips: Mobile Apps: Download and use mobile apps provided by your security system provider for remote access, alerts, and control. Monitor surveillance cameras, arm/disarm alarms, and receive notifications on your smartphone or tablet. Voice Control: Integrate security systems with voice assistants such as Amazon Alexa or Google Assistant for hands-free control and voice commands. Use voice commands to check security status, lock doors, or activate alarms. Remote Monitoring: Subscribe to remote monitoring services that offer 24/7 surveillance, alerts, and emergency response coordination. Access live video feeds, view activity logs, and receive notifications for security events. By incorporating these essential security systems and features into your home, you can create a comprehensive security plan that safeguards your property, assets, and loved ones. Customize security solutions based on your needs, budget, and lifestyle for effective protection and peace of
Stylish Bathroom Fixtures: Faucets and Accessories
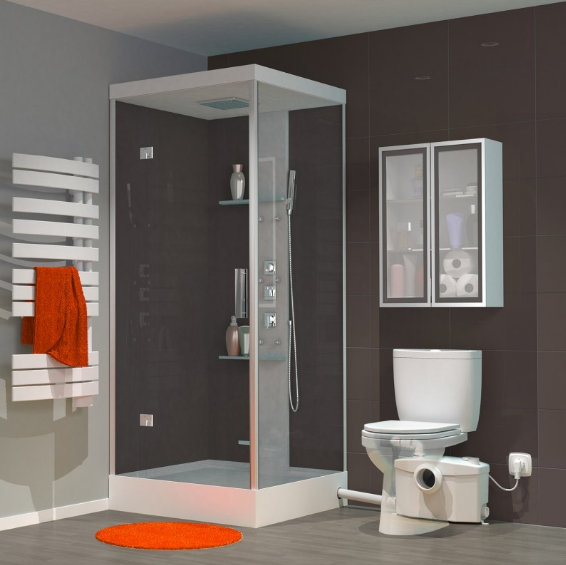
Bathroom fixtures play a crucial role in not just functionality but also in enhancing the overall aesthetics of your bathroom space. Stylish faucets and accessories can transform a mundane bathroom into a luxurious retreat, adding elegance, functionality, and a touch of personality. In this guide, we’ll delve into the world of stylish bathroom fixtures, focusing on faucets and accessories that elevate the design and functionality of your bathroom. Subtitles: Elegant Faucet Designs for Every Style Accessorizing Your Bathroom: Functional and Stylish Additions Elegant Faucet Designs for Every Style 1. Modern Minimalism For a sleek and contemporary look, consider modern faucet designs characterized by clean lines, geometric shapes, and minimalist aesthetics: Single-Lever Faucets: Streamlined and easy to use, single-lever faucets offer a minimalist look with efficient temperature and flow control. Wall-Mounted Faucets: Create a floating vanity effect with wall-mounted faucets that free up countertop space and add a touch of modern elegance. 2. Classic Elegance Opt for classic faucet styles that exude timeless elegance and sophistication, perfect for traditional or transitional bathroom designs: Widespread Faucets: Featuring separate handles for hot and cold water, widespread faucets offer a traditional look with customizable spacing for a personalized touch. Bridge Faucets: Reminiscent of vintage designs, bridge faucets combine a classic aesthetic with modern functionality, making them a focal point in traditional bathrooms. 3. Contemporary Chic Embrace contemporary chic with stylish faucet designs that blend form and function, ideal for modern and eclectic bathroom settings: Waterfall Faucets: Create a spa-like ambiance with waterfall faucets that cascade water gently, adding a sense of luxury and relaxation. Black Matte Finishes: Make a bold statement with black matte finishes that offer a modern twist on traditional faucet styles, adding a touch of drama and sophistication. Accessorizing Your Bathroom: Functional and Stylish Additions 1. Shower Fixtures Upgrade your shower experience with stylish and functional shower fixtures that enhance comfort and convenience: Rainfall Showerheads: Enjoy a luxurious showering experience with oversized rainfall showerheads that provide gentle, cascading water for a spa-like feel. Handheld Showerheads: Combine versatility and style with handheld showerheads that offer targeted water flow and flexibility for different showering preferences. 2. Towel Bars and Hooks Accessorize your bathroom with practical yet stylish towel bars and hooks for added convenience and organization: Heated Towel Bars: Keep towels warm and cozy with heated towel bars that also add a touch of luxury to your bathroom experience. Decorative Hooks: Choose decorative hooks in complementing styles to hang robes, towels, and bath accessories while adding visual interest to your bathroom walls. 3. Vanity Accessories Complete your bathroom vanity with functional and stylish accessories that enhance organization and functionality: Soap Dispensers: Opt for sleek and coordinated soap dispensers that complement your faucet style while keeping your vanity clutter-free. Storage Solutions: Incorporate vanity organizers, drawer dividers, and trays to streamline storage and keep essentials within easy reach. 4. Lighting Fixtures Illuminate your bathroom with well-placed lighting fixtures that enhance visibility, ambiance, and style: Vanity Lights: Install vanity lights above or beside mirrors for optimal task lighting that complements your overall bathroom design. Accent Lighting: Add accent lighting such as wall sconces or pendant lights to highlight architectural features, artwork, or focal points in your bathroom. By choosing stylish faucets and accessories that align with your design preferences, you can create a cohesive and visually appealing bathroom space that combines functionality with elegance. Consider the overall theme, color palette, and design elements of your bathroom to select fixtures and accessories that harmonize with the aesthetic while enhancing the user experience. With thoughtful attention to detail, your bathroom fixtures can elevate the style and functionality of your space, making it a true oasis of comfort and luxury.
Creating a Functional Laundry Room: Storage and Layout
Designing a functional and organized laundry room is essential for efficient household management and laundry tasks. With thoughtful planning, strategic storage solutions, and an optimized layout, you can transform your laundry room into a space that enhances productivity, streamlines laundry routines, and maximizes storage capacity. In this guide, we’ll explore strategies for creating a functional laundry room, focusing on storage solutions and layout considerations to meet your laundry needs effectively. Subtitles: Planning Your Laundry Room Design Optimizing Storage and Layout for Efficiency Planning Your Laundry Room Design 1. Assessing Laundry Needs Start by assessing your laundry needs, habits, and workflow to determine the functional requirements of your laundry room. Consider factors such as laundry frequency, types of clothing/items laundered, storage needs, and space utilization. Tips: Laundry Volume: Determine the average amount of laundry generated daily or weekly to size appliances and plan storage accordingly. Storage Requirements: Identify storage needs for detergents, cleaning supplies, linens, clothing, and laundry accessories. Allocate space for sorting, folding, and ironing tasks. Utility Considerations: Assess plumbing, electrical, and ventilation requirements for washer, dryer, sink, and utility connections. 2. Designing Efficient Layout Design an efficient layout that optimizes space, facilitates workflow, and minimizes unnecessary movements during laundry tasks. Consider the flow of activities from sorting and washing to drying, folding, and storage. Tips: Workflow Zones: Create distinct zones for sorting, washing, drying, folding, and storage to streamline laundry tasks. Arrange appliances, countertops, and storage units for efficient movement between zones. Traffic Flow: Ensure clear pathways and adequate space around appliances, countertops, and work areas to prevent congestion and facilitate movement. Accessibility: Design the layout with ergonomics in mind, considering the height of appliances, countertop surfaces, and storage units for comfortable use. Optimizing Storage and Layout for Efficiency 1. Functional Storage Solutions Implement functional storage solutions to organize laundry supplies, clothing, linens, and accessories while maximizing space utilization and accessibility. Choose storage options that suit your needs and available space. Tips: Cabinetry and Shelving: Install wall-mounted cabinets, open shelves, or freestanding shelving units for storing detergents, fabric softeners, cleaning products, and laundry baskets. Utilize adjustable shelves for customizable storage. Baskets and Bins: Use baskets, bins, and storage containers to categorize and contain items such as socks, delicates, linens, and laundry accessories. Label containers for easy identification. Built-in Features: Incorporate built-in features such as pull-out hampers, drying racks, ironing boards, and garment rods for added functionality within the laundry room. 2. Space-Saving Solutions Maximize space in a compact laundry room by utilizing space-saving solutions that optimize vertical storage, multifunctional features, and efficient use of available space. Tips: Stacked Appliances: Consider stacking washer and dryer units to free up floor space and maximize vertical storage. Use front-loading appliances for easier access and space efficiency. Folding Countertops: Install folding countertops or pull-out folding tables that can be tucked away when not in use. Use countertops for sorting, folding, and organizing laundry. Wall-Mounted Accessories: Utilize wall-mounted accessories such as drying racks, ironing board holders, and utility hooks to keep surfaces clear and maximize functionality. 3. Functional Layout Considerations Optimize the layout of appliances, work surfaces, and storage units to enhance functionality, workflow efficiency, and user convenience within the laundry room. Tips: Appliance Placement: Position washer and dryer units near utility connections and plumbing for easy installation and maintenance. Allow space for door clearance and ventilation. Work Surfaces: Include ample countertop space for sorting, folding, and organizing laundry. Use durable and easy-to-clean materials such as laminate, quartz, or stainless steel. Task Lighting: Install task lighting above work areas, appliances, and storage units to ensure adequate illumination for laundry tasks. Use energy-efficient LED lights for bright and focused lighting. By incorporating thoughtful planning, efficient layout design, functional storage solutions, and space-saving features, you can create a functional and organized laundry room that enhances productivity, simplifies laundry routines, and maximizes storage capacity. Tailor the design to suit your specific needs, preferences, and available space for a customized and efficient laundry room that makes laundry tasks more manageable and enjoyable. Regular maintenance and organization reviews ensure that the laundry room remains functional, clutter-free, and optimized for efficient use.
Installing Smart Thermostats for Energy Savings
Smart thermostats offer innovative solutions for managing home heating and cooling systems, providing energy savings, convenience, and personalized comfort. By upgrading to a smart thermostat, homeowners can optimize energy usage, reduce utility costs, and create a more comfortable living environment. In this guide, we’ll explore the benefits of installing smart thermostats for energy savings and efficiency, along with key considerations and tips for maximizing their performance. Subtitles: Understanding Smart Thermostat Technology Benefits of Energy-Efficient Temperature Control Understanding Smart Thermostat Technology 1. Remote Access and Control One of the primary features of smart thermostats is their ability to be controlled remotely via mobile apps or web interfaces. This allows homeowners to adjust temperature settings, monitor energy usage, and schedule heating or cooling cycles from anywhere, providing convenience and flexibility. Tips: Mobile Apps: Download the manufacturer’s app compatible with your smart thermostat to gain remote access and control. Ensure the app offers user-friendly interfaces and intuitive navigation. Wi-Fi Connectivity: Connect your smart thermostat to your home Wi-Fi network for seamless remote access and updates. Verify network compatibility and security settings for data protection. Voice Commands: Some smart thermostats support voice commands through virtual assistants like Amazon Alexa or Google Assistant, enabling hands-free control of temperature settings. 2. Learning and Adaptive Algorithms Many smart thermostats feature learning algorithms that analyze user behavior, occupancy patterns, and environmental conditions to optimize temperature settings automatically. These adaptive algorithms adjust heating and cooling cycles based on preferences, occupancy, and energy-saving goals. Tips: Initial Setup: Follow the manufacturer’s instructions for initial setup and configuration, including preferences for temperature ranges, schedules, and comfort settings. Adaptive Learning: Allow time for the smart thermostat to learn your habits and preferences. Provide feedback and adjustments as needed to fine-tune its performance. Occupancy Sensors: Utilize occupancy sensors or motion detectors if available to optimize energy usage based on room occupancy. Customize settings for different zones or areas of the home. 3. Energy Usage Tracking and Reports Smart thermostats provide detailed energy usage data, reports, and insights to help homeowners monitor and analyze heating and cooling patterns. This information empowers users to make informed decisions, identify energy-saving opportunities, and adjust settings for efficiency. Tips: Usage History: Review daily, weekly, or monthly energy usage reports provided by the smart thermostat. Identify trends, peak usage times, and potential areas for improvement. Energy-saving Tips: Use energy-saving tips and recommendations offered by the smart thermostat app or interface. Implement suggested changes to optimize energy efficiency without compromising comfort. Budget Tracking: Some smart thermostats offer budget tracking features that estimate energy costs based on usage patterns. Set budget goals and alerts to manage expenses effectively. Benefits of Energy-Efficient Temperature Control 1. Cost Savings and Efficiency Smart thermostats help reduce energy waste by optimizing temperature settings based on occupancy, preferences, and external factors such as weather conditions. This leads to lower utility bills, increased energy efficiency, and cost savings over time. Tips: Temperature Scheduling: Create customized temperature schedules based on daily routines, occupancy patterns, and sleep schedules. Program setbacks or adjustments during periods of low activity or when occupants are away. Temperature Limits: Set temperature limits or boundaries to prevent excessive heating or cooling, ensuring comfort while maximizing energy savings. Use eco-friendly settings and energy-saving modes for extended periods of absence. 2. Comfort and Convenience Smart thermostats offer personalized comfort settings tailored to individual preferences, ensuring optimal indoor conditions throughout the day. Features such as geofencing, vacation modes, and adaptive learning enhance comfort and convenience for occupants. Tips: Geofencing: Use geofencing capabilities to detect occupants’ proximity to home and adjust temperature settings accordingly. This feature helps conserve energy when occupants are away and pre-condition the home for their return. Vacation Modes: Activate vacation or away modes when leaving for extended periods to minimize energy usage. Set temperature setbacks or energy-saving profiles to maintain safe and efficient heating or cooling. Custom Comfort Profiles: Create custom comfort profiles for different occupants or zones within the home. Fine-tune settings for bedrooms, living areas, and other spaces based on individual preferences. 3. Environmental Impact and Sustainability By reducing energy consumption and optimizing heating and cooling cycles, smart thermostats contribute to environmental sustainability and reduced carbon footprint. Energy-efficient temperature control helps conserve natural resources and promotes eco-friendly practices. Tips: Energy-saving Tips: Implement energy-saving tips and recommendations provided by the smart thermostat app or manufacturer. Adjust settings, upgrade insulation, and perform HVAC maintenance to further enhance efficiency. Integration with Smart Home Systems: Integrate smart thermostats with other smart home systems such as lighting, shades, and appliances for coordinated energy management. Use energy dashboards or reports to track overall home energy usage. In conclusion, installing smart thermostats offers numerous benefits, including energy savings, cost efficiency, personalized comfort, and environmental sustainability. By understanding smart thermostat technology, utilizing energy-saving features, and optimizing temperature control, homeowners can create a more efficient and comfortable living environment while reducing their carbon footprint. Embracing smart technology for energy management is a step towards a greener and more sustainable future.
DIY Backyard Projects: Enhancing Outdoor Living
Transforming your backyard into a functional and inviting outdoor space can elevate your lifestyle, promote relaxation, and enhance social gatherings. DIY backyard projects offer creative and cost-effective ways to improve your outdoor living area while expressing your personal style and preferences. In this guide, we’ll explore DIY backyard projects that enhance outdoor living and create a welcoming environment for enjoyment and entertainment. Subtitles: Benefits of DIY Backyard Projects Creative DIY Ideas for Outdoor Enhancements Benefits of DIY Backyard Projects 1. Personalization and Creativity Engaging in DIY backyard projects allows you to personalize your outdoor space and unleash your creativity. From design concepts to material choices and decor elements, DIY projects enable you to tailor every detail to suit your preferences and lifestyle. Tips: Customization: Customize DIY projects to reflect your aesthetic preferences, color schemes, and thematic elements. Incorporate personal touches, artwork, and decorative accents that resonate with your style. Creative Solutions: Explore creative solutions and repurposing ideas for outdoor furniture, decor, and landscaping. Upcycle materials, use reclaimed wood, or repurpose household items for unique and eco-friendly projects. 2. Cost-Effective Enhancements DIY backyard projects offer cost-effective solutions for enhancing outdoor living without breaking the bank. By leveraging your skills, resources, and creativity, you can achieve impressive results and save on labor costs. Tips: Budget-Friendly Materials: Source budget-friendly materials such as pallet wood, concrete pavers, recycled bricks, and thrifted furniture for DIY projects. Compare prices, look for sales or discounts, and repurpose existing materials whenever possible. DIY Kits and Tutorials: Utilize DIY kits, online tutorials, and instructional videos for guidance and inspiration. Follow step-by-step instructions, gather necessary tools, and plan your projects to stay within budget. Creative DIY Ideas for Outdoor Enhancements 1. Outdoor Seating and Dining Create comfortable and stylish seating areas for outdoor lounging, dining, and socializing. DIY seating projects can range from benches and chairs to hammocks and swing sets, providing functional and inviting spaces for relaxation. Tips: Pallet Furniture: Build outdoor furniture using pallets, crates, or reclaimed wood. Design benches, tables, and seating sets with cushions, pillows, and weather-resistant finishes for durability. Repurposed Materials: Repurpose old furniture, crates, barrels, or tires to create unique seating options. Add cushions, upholstery, and decorative elements to enhance comfort and aesthetics. 2. Garden and Landscaping Enhancements Enhance your backyard’s landscaping with DIY garden projects that add beauty, functionality, and sustainability. From raised garden beds to vertical gardens and water features, landscaping projects can transform your outdoor space. Tips: Raised Garden Beds: Build raised garden beds using wood, stone, or metal materials. Plant herbs, vegetables, or flowers in organized layouts for easy maintenance and visual appeal. Vertical Gardens: Construct vertical garden structures or living walls using pallets, trellises, or hanging planters. Grow climbing plants, vines, or succulents to maximize vertical space and create greenery. Water Features: Install DIY water features such as fountains, ponds, or waterfalls to add tranquility and visual interest. Use recycled materials, natural stones, and aquatic plants for eco-friendly designs. 3. Outdoor Cooking and Entertainment Enhance your outdoor living experience with DIY projects for cooking, entertaining, and recreational activities. Create outdoor kitchens, fire pits, play areas, and entertainment zones for memorable gatherings. Tips: DIY Fire Pit: Build a fire pit using bricks, concrete blocks, or metal rings. Include seating around the fire pit for cozy gatherings, marshmallow roasting, and evening ambiance. Outdoor Kitchen: Design an outdoor kitchen with DIY countertops, cabinets, and grill stations. Incorporate durable materials, storage solutions, and food preparation areas for culinary experiences. Play Structures: Build DIY play structures such as swing sets, playhouses, or sandboxes for children’s enjoyment. Ensure safety features, soft landing surfaces, and age-appropriate designs. 4. Lighting and Decorative Accents Illuminate your backyard with creative lighting solutions and decorative accents that enhance ambiance, safety, and aesthetics. DIY lighting projects can include string lights, lanterns, solar-powered fixtures, and artistic installations. Tips: String Lights: Hang string lights across outdoor spaces, trees, pergolas, or fences for a magical ambiance. Choose energy-efficient LED lights, waterproof designs, and adjustable settings for versatility. Solar-Powered Fixtures: Install solar-powered lights, path markers, and garden accents for eco-friendly illumination. Place solar lights along pathways, borders, and landscaping features for nighttime visibility. Artistic Installations: Create DIY art installations, sculptures, or murals that complement your outdoor theme and express your creativity. Use recycled materials, mosaic tiles, or metalwork for artistic statements. 5. Eco-Friendly and Sustainable Projects Incorporate eco-friendly practices and sustainable materials into your DIY backyard projects to minimize environmental impact and promote green living. Embrace gardening, composting, rainwater harvesting, and native plantings for eco-conscious designs. Tips: Rain Barrels: Install DIY rain barrels or cisterns to collect rainwater for watering plants, gardens, and landscapes. Use harvested rainwater for sustainable irrigation and conservation efforts. Composting Stations: Create DIY composting stations or bins for organic waste recycling and soil enrichment. Utilize kitchen scraps, yard trimmings, and biodegradable materials for composting. Native Plant Gardens: Design native plant gardens, pollinator habitats, or wildlife-friendly landscapes using locally adapted plants. Support biodiversity, reduce water consumption, and attract beneficial insects and wildlife. By embracing DIY backyard projects, you can transform your outdoor space into a functional, beautiful, and sustainable environment that enhances your lifestyle and promotes outdoor enjoyment. Prioritize safety, planning, and creativity in your DIY endeavors, and seek inspiration from online resources, tutorials, and community collaborations. With a hands-on approach and a bit of creativity, you can create a backyard retreat that reflects your personality, values, and love for outdoor living.
Choosing the Right Flooring: Materials and Maintenance
Selecting the right flooring for your home involves considering factors such as durability, aesthetics, maintenance requirements, and budget. With a wide range of flooring materials available, each offering unique features and benefits, homeowners can find options that suit their lifestyle, design preferences, and practical needs. In this guide, we’ll explore the considerations for choosing the right flooring materials and share maintenance tips to keep your floors looking their best for years to come. Subtitles: Factors to Consider When Choosing Flooring Maintenance Tips for Different Flooring Types Factors to Consider When Choosing Flooring 1. Durability and Traffic Patterns Consider the level of foot traffic in each area of your home when choosing flooring materials. High-traffic areas such as entryways, hallways, and living rooms may require more durable options that can withstand heavy use and potential wear and tear. Tips: Hardwood Flooring: Opt for hardwood flooring with high Janka hardness ratings for durability in high-traffic areas. Choose hardwood species like oak, maple, or hickory known for their strength and resilience. Luxury Vinyl Plank (LVP): Consider LVP for areas prone to moisture or spills, such as kitchens, bathrooms, and basements. LVP offers water resistance, durability, and easy maintenance. 2. Aesthetic Appeal and Design Harmony Select flooring materials that complement your home’s interior design style, color palette, and overall aesthetic. Consider factors such as texture, pattern, color, and finish to achieve the desired look and feel in each room. Tips: Wood Flooring: Choose wood flooring species, stains, and finishes that enhance the ambiance of your home. Lighter woods like birch or ash can create a bright, airy feel, while darker woods like walnut or mahogany add warmth and richness. Tile Flooring: Explore tile options in various colors, patterns, and sizes to match your design scheme. Use mosaic tiles for artistic accents or large-format tiles for a seamless, modern look. 3. Maintenance Requirements and Lifestyle Considerations Evaluate the maintenance needs of different flooring materials based on your lifestyle, household members, and cleaning preferences. Some flooring types may require regular maintenance, while others offer easy cleaning and upkeep. Tips: Carpeting: Choose stain-resistant and easy-to-clean carpets for bedrooms or low-traffic areas. Consider carpet tiles for versatility and spot cleaning convenience. Laminate Flooring: Opt for laminate flooring with scratch-resistant and moisture-resistant properties for busy households with pets or children. Follow manufacturer guidelines for cleaning and maintenance to preserve its appearance. Maintenance Tips for Different Flooring Types 1. Hardwood Flooring Regular Cleaning: Sweep or vacuum hardwood floors regularly to remove dust, dirt, and debris. Use a damp mop with a wood floor cleaner for deeper cleaning. Avoid Water Damage: Wipe up spills immediately to prevent water damage and warping. Place mats or rugs in high-spill areas like entryways and kitchens. Protective Measures: Use furniture pads under heavy furniture legs to prevent scratches. Trim pet nails regularly to minimize scratches on hardwood surfaces. 2. Tile Flooring Grout Cleaning: Clean grout lines regularly using a grout cleaner or mild detergent to prevent staining and discoloration. Sealing Tiles: Apply a sealant to natural stone tiles or porous ceramic tiles to protect against moisture absorption and stains. Avoid Abrasive Cleaners: Use non-abrasive cleaners and avoid harsh chemicals that may damage tile surfaces or grout. 3. Laminate Flooring Gentle Cleaning: Use a soft, damp cloth or mop with a laminate floor cleaner to remove dirt and spills. Avoid excessive water or steam on laminate floors. Protective Mats: Place mats or rugs at entryways and high-traffic areas to trap dirt and prevent scratches. Avoid Wax or Polish: Refrain from using wax, polish, or oil-based cleaners on laminate floors, as they can leave residue and dull the finish. 4. Vinyl Flooring Regular Sweeping: Sweep or vacuum vinyl floors regularly to remove dirt and debris. Use a damp mop with a mild cleaner for deeper cleaning. Avoid Abrasive Tools: Avoid using abrasive tools or harsh chemicals that may damage vinyl surfaces. Follow manufacturer guidelines for cleaning products. Protective Pads: Use furniture pads or coasters under furniture legs to prevent scratches and dents. 5. Carpet Flooring Vacuuming: Vacuum carpeted areas weekly to remove dirt, dust, and allergens. Use a carpet cleaner or professional steam cleaning periodically for deep cleaning. Spot Cleaning: Address spills and stains promptly using a carpet stain remover or mild detergent. Blot, don’t rub, to avoid spreading stains. Professional Cleaning: Schedule professional carpet cleaning every 12-18 months to maintain freshness and prolong carpet life. By considering factors such as durability, aesthetics, maintenance requirements, and lifestyle considerations, homeowners can make informed decisions when choosing flooring materials for their homes. Implementing proper maintenance practices, including regular cleaning, protective measures, and professional treatments as needed, can extend the lifespan and beauty of your floors, ensuring they remain functional and attractive for years to come. Consult with flooring experts or contractors for personalized recommendations based on your specific needs and preferences.
Remodeling Your Attic: Adding Value to Your Home
Remodeling your attic is a strategic way to add value to your home while maximizing underutilized space. Whether you’re looking to create an additional bedroom, a home office, a recreational area, or a guest suite, transforming your attic can significantly enhance the functionality, comfort, and overall appeal of your property. In this guide, we’ll explore the benefits of remodeling your attic and provide insights into the process of adding value through attic renovation. Subtitles: Benefits of Attic Remodeling Key Considerations for a Successful Attic Renovation Benefits of Attic Remodeling 1. Increased Living Space One of the primary benefits of remodeling your attic is the opportunity to increase your home’s living space without the need for a costly addition. By converting the attic into a functional room or living area, you can accommodate growing family needs, create private retreats, or add versatile spaces for work, leisure, or guests. Tips: Additional Bedroom: Transforming your attic into a bedroom can be an ideal solution for expanding living space and accommodating guests or family members. Incorporate storage solutions, natural light, and insulation for comfort and functionality. Home Office or Study: Design a home office or study area in your attic to create a dedicated workspace for remote work, creative projects, or quiet study sessions. Consider built-in storage, ergonomic furniture, and adequate lighting for productivity. Recreational Space: Use your attic as a recreational space for hobbies, entertainment, or relaxation. Create a game room, media room, yoga studio, or reading nook tailored to your interests and lifestyle. Guest Suite: Design a guest suite in your attic with a bedroom, bathroom, and sitting area for visiting family or friends. Incorporate amenities like a mini kitchenette or a cozy seating alcove for added comfort. 2. Value Addition to Your Home Remodeling your attic adds tangible value to your home by increasing its square footage, functionality, and market appeal. A well-designed and properly renovated attic can enhance the overall value and resale potential of your property. Tips: Professional Design and Construction: Work with experienced architects, designers, and contractors to plan and execute your attic remodeling project. Ensure compliance with building codes, safety standards, and structural considerations. Quality Materials and Finishes: Use high-quality materials, finishes, and fixtures for your attic renovation to ensure durability, longevity, and aesthetic appeal. Choose energy-efficient options for insulation, windows, and HVAC systems. Enhanced Curb Appeal: Consider the exterior impact of your attic renovation on your home’s curb appeal. Coordinate design elements, colors, and roofline modifications to create a cohesive and attractive look. Appraisal and Market Value: Consult with real estate professionals or appraisers to assess the potential increase in market value resulting from your attic remodeling. Factors such as location, neighborhood trends, and buyer preferences can influence the perceived value of added attic space. Key Considerations for a Successful Attic Renovation 1. Structural Integrity Before embarking on an attic remodeling project, assess the structural integrity of your attic space. Ensure that the attic floor can support the intended use and weight requirements, especially for bedrooms or living areas. Tips: Professional Inspection: Hire a structural engineer or professional inspector to evaluate the attic’s load-bearing capacity, roof structure, framing, and ventilation. Address any structural deficiencies or safety concerns before proceeding with renovation. Reinforcement and Support: Reinforce attic floors, walls, and roof structures as needed to meet building codes and safety standards. Install proper insulation, vapor barriers, and fire-resistant materials for comfort and safety. 2. HVAC and Utilities Consider the HVAC (Heating, Ventilation, and Air Conditioning) needs and utility requirements for your attic renovation. Ensure adequate heating, cooling, ventilation, and electrical capacity to support the new living space. Tips: HVAC Extension: Extend your existing HVAC system to provide heating and cooling to the attic space. Install ductwork, vents, and registers for efficient climate control. Insulation and Energy Efficiency: Improve insulation levels in the attic to enhance energy efficiency and comfort. Consider energy-efficient windows, skylights, and roofing materials to minimize heat loss or gain. Electrical Wiring: Plan for sufficient electrical outlets, lighting fixtures, and wiring for technology integration, appliances, and lighting in your attic renovation. Consult with an electrician to ensure compliance with electrical codes and safety standards. 3. Design and Functionality Design your attic renovation with a focus on functionality, aesthetics, and usability. Tailor the design to suit your lifestyle needs, preferences, and long-term goals for the space. Tips: Space Planning: Plan the layout of your attic space to optimize functionality and flow. Consider traffic patterns, furniture placement, storage solutions, and multi-use areas for versatility. Natural Light: Maximize natural light in your attic renovation by incorporating skylights, dormer windows, or large windows. Natural light enhances ambiance, visual appeal, and energy efficiency. Storage Solutions: Integrate built-in storage, closets, shelving units, or attic trusses for efficient storage solutions. Utilize under-eaves spaces, alcoves, and hidden compartments for added storage capacity. Safety Features: Install smoke detectors, carbon monoxide detectors, and fire extinguishers in your attic renovation for safety and compliance with building codes. Consider escape routes, emergency exits, and access points for evacuation. By carefully planning, designing, and executing your attic renovation, you can add significant value to your home while creating functional and appealing living spaces. Consult with professionals, prioritize safety and structural considerations, and personalize the design to suit your lifestyle and aesthetic preferences. A well-executed attic remodeling project can enhance the livability, marketability, and enjoyment of your home for years to come.
Maximizing Natural Light in Your Home: Windows and Skylights
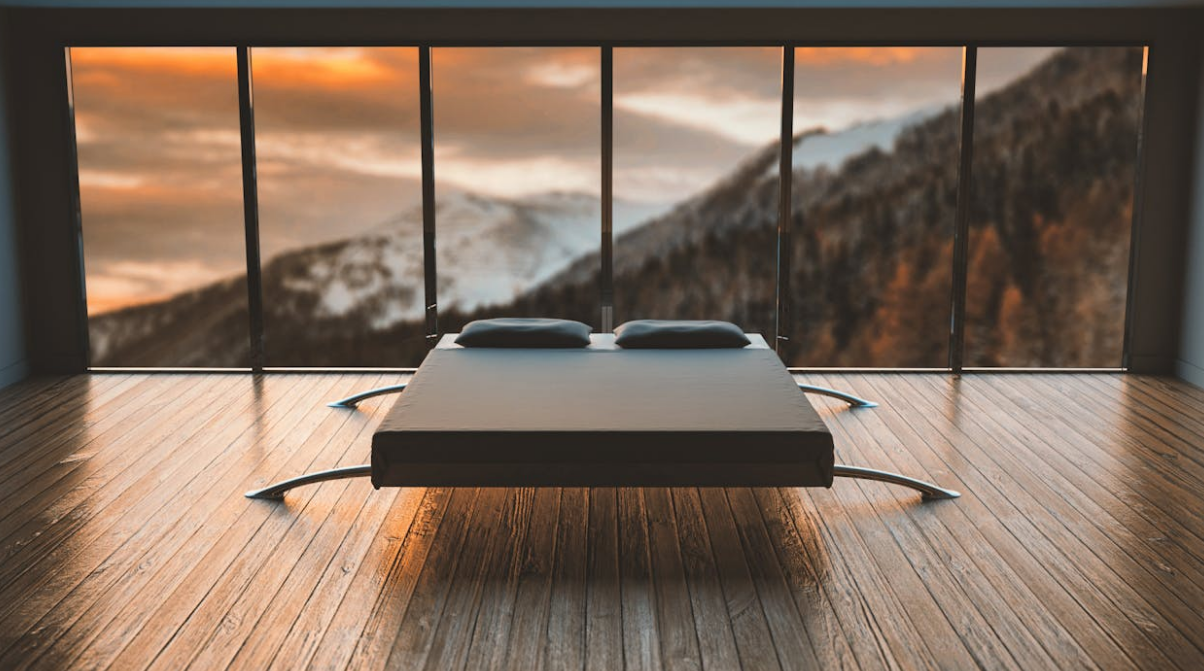
Natural light is not only aesthetically pleasing but also plays a significant role in enhancing the ambiance, energy efficiency, and overall well-being of your home. By maximizing natural light through strategic placement of windows and skylights, you can create bright, inviting spaces that feel spacious, comfortable, and connected to the outdoors. In this guide, we’ll explore techniques for optimizing natural light in your home using windows and skylights, along with tips for enhancing interior design and energy efficiency. Subtitles: Harnessing the Benefits of Natural Light Strategies for Maximizing Natural Light with Windows and Skylights Harnessing the Benefits of Natural Light 1. Health and Well-Being Natural light exposure has numerous health benefits, including: Vitamin D Synthesis: Sunlight exposure helps the body produce vitamin D, essential for bone health and immune function. Mood Enhancement: Natural light can improve mood, reduce stress, and enhance overall well-being. Circadian Rhythm Regulation: Exposure to natural light helps regulate sleep-wake cycles and promotes better sleep quality. 2. Energy Efficiency Maximizing natural light reduces the need for artificial lighting during the day, leading to: Energy Savings: Reduced reliance on artificial lighting lowers energy consumption and utility costs. Environmental Impact: Lower energy usage contributes to environmental sustainability and reduces carbon footprint. 3. Aesthetic Appeal Natural light creates a bright, airy, and inviting atmosphere, enhancing: Interior Design: Light-filled spaces appear larger, more open, and showcase architectural features and décor elements. Visual Comfort: Well-lit rooms reduce eyestrain, improve visibility, and highlight natural textures and colors. Strategies for Maximizing Natural Light with Windows and Skylights 1. Window Placement and Size Optimize natural light by strategically placing windows and maximizing their size and functionality: Southern Exposure: Maximize south-facing windows for abundant sunlight throughout the day, especially during winter months. East and West Windows: Utilize east-facing windows for morning light and west-facing windows for afternoon sunlight. Consider window treatments to control glare and heat gain. North-Facing Windows: Use north-facing windows for softer, diffused light that reduces glare and provides consistent illumination. 2. Window Styles and Features Choose window styles and features that enhance natural light penetration and control: Large Picture Windows: Install large picture windows to capture panoramic views, maximize daylight, and create focal points in living areas. Operable Windows: Use operable windows such as casement, awning, or tilt-turn windows for ventilation, natural airflow, and daylighting control. Transom Windows: Incorporate transom windows above doors or other windows to bring in additional light without compromising privacy. 3. Skylights and Light Tubes Integrate skylights and light tubes to introduce natural light into interior spaces with limited access to windows: Skylight Placement: Install skylights in areas like kitchens, bathrooms, hallways, and stairwells to brighten dark spaces and reduce reliance on artificial lighting. Tubular Daylighting Devices: Use light tubes or sun tunnels to channel sunlight into interior rooms, closets, or corridors where traditional windows or skylights are impractical. 4. Light-Reflective Surfaces Enhance natural light distribution and brightness with light-reflective surfaces and finishes: Light-Colored Walls: Choose light-colored paint or wallpaper for walls to reflect and diffuse natural light, creating a brighter and more spacious feel. Mirrors and Glass: Position mirrors strategically to reflect light and create optical illusions of larger spaces. Use glass doors, partitions, and furniture to allow light to pass through and enhance visual connectivity. 5. Window Treatments and Controls Select window treatments and controls that balance natural light, privacy, and energy efficiency: Sheer Curtains and Blinds: Use sheer curtains, blinds, or shades to diffuse sunlight, reduce glare, and maintain privacy while still allowing natural light to filter through. Smart Controls: Consider motorized or smart window treatments that adjust automatically based on sunlight intensity, time of day, and user preferences for optimal light management and energy savings. By implementing these strategies for maximizing natural light with windows and skylights, you can create a brighter, more comfortable, and energy-efficient home environment that enhances well-being, visual appeal, and connectivity to the outdoors. Consult with design professionals, architects, and window specialists to customize solutions tailored to your home’s orientation, architecture, and lighting goals, ensuring optimal natural light utilization and interior comfort throughout the year.
Painting Techniques for a Professional Finish
Achieving a professional finish in painting requires not just quality paint and tools but also proper techniques and attention to detail. Whether you’re painting walls, furniture, or artwork, mastering painting techniques can elevate the final result, giving it a polished and professional look. In this guide, we’ll explore essential painting techniques that contribute to a professional finish and enhance the overall aesthetic appeal of your painting projects. Subtitles: Preparation and Priming Application Techniques for Smooth and Even Coats Preparation and Priming 1. Surface Preparation Preparing the painting surface is crucial for a professional finish. Clean the surface thoroughly to remove dirt, grease, and dust that can affect paint adhesion. Repair any cracks, holes, or imperfections using spackling compound or filler, and sand the surface smooth for even paint application. Tips: Cleaning: Use a mild detergent or cleaner to wash walls, furniture, or surfaces before painting. Rinse thoroughly and allow the surface to dry completely. Repairing: Fill cracks, nail holes, and blemishes with spackling paste or filler. Sand the patched areas once dry to create a smooth surface for painting. Sanding: Use fine-grit sandpaper (such as 120-grit) to sand surfaces lightly, removing rough spots and ensuring paint adhesion. Wipe away dust with a tack cloth or damp cloth. 2. Priming Priming the surface before painting is essential for optimal paint adhesion, coverage, and durability. Choose a primer suitable for the surface type (e.g., latex primer for walls, wood primer for furniture) and apply it evenly using a brush, roller, or sprayer. Tips: Primer Selection: Select a primer based on the surface material (e.g., wood, drywall, metal) and the type of paint you’ll be using (e.g., latex, oil-based). Use tinted primers for better color coverage and adhesion. Primer Application: Apply primer evenly in smooth, overlapping strokes using a brush or roller. Use a sprayer for large surfaces for faster and more consistent coverage. Allow the primer to dry completely before painting. Application Techniques for Smooth and Even Coats 1. Brush Techniques Using the right brush and applying paint with proper brush techniques contribute to a smooth and even finish. Choose high-quality brushes suitable for the paint type (e.g., synthetic brushes for latex paint, natural bristle brushes for oil-based paint) and practice brush control for precise application. Tips: Brush Selection: Use angled brushes for cutting in edges and corners, flat brushes for large areas, and detail brushes for intricate work. Clean brushes thoroughly before use to remove any loose bristles or debris. Loading the Brush: Dip the brush into the paint, then tap off excess paint to avoid drips or blobs. Load the brush evenly for consistent coverage and avoid overloading, which can lead to streaks or drips. Brush Strokes: Use smooth, even strokes with the brush, following the natural direction of the surface (e.g., vertical strokes for walls, horizontal strokes for furniture). Feather edges and blend strokes for seamless transitions. 2. Roller Techniques Painting with a roller allows for faster coverage and a more uniform finish on large surfaces. Choose the appropriate roller nap (thickness) based on the surface texture (e.g., smooth, semi-smooth, textured) and use proper roller techniques for optimal results. Tips: Roller Selection: Use short nap rollers (3/8 to 1/2 inch) for smooth surfaces and longer nap rollers (3/4 to 1 1/4 inch) for textured surfaces. Use foam rollers for ultra-smooth finishes on trim or cabinets. Roller Loading: Dip the roller into the paint tray, then roll it back and forth to evenly distribute paint on the roller cover. Avoid overloading the roller, which can cause drips or uneven application. Roller Application: Roll paint onto the surface using a W or M pattern to distribute paint evenly. Use light pressure and avoid pressing too hard, which can create roller marks or streaks. Feather edges and blend sections for a seamless finish. 3. Spraying Techniques Spray painting is ideal for large areas, furniture, and detailed work where a smooth, fine finish is desired. Proper spraying techniques, including gun control, distance, and overlapping passes, contribute to a professional finish. Tips: Spray Gun Setup: Adjust spray gun settings (e.g., air pressure, nozzle size, spray pattern) according to the paint type and desired finish. Test spray on a scrap surface to check coverage and adjust settings as needed. Spray Distance: Maintain a consistent distance (usually 6 to 12 inches) between the spray gun and the surface for even coverage. Move the gun smoothly and steadily, overlapping each pass slightly to avoid gaps or unevenness. Spray Technique: Start spraying before reaching the surface and continue spraying past the edge to prevent abrupt starts and stops. Keep the gun perpendicular to the surface for uniform coverage, and adjust speed for optimal paint flow. 4. Drying and Finishing Allow sufficient drying time between coats to ensure proper adhesion and avoid smudging or blending of layers. Follow manufacturer’s recommendations for drying times and apply additional coats as needed for full coverage and durability. Use fine-grit sandpaper between coats for smoothness, and apply a topcoat or sealer for protection and a professional finish. Tips: Drying Time: Allow paint to dry completely between coats (usually 2 to 4 hours) before sanding or applying additional coats. Use fans or ventilation to speed up drying in well-ventilated areas. Sanding Between Coats: Lightly sand surfaces between coats with fine-grit sandpaper (e.g., 220-grit) to smooth out imperfections, bumps, or brush marks. Wipe away dust with a tack cloth or damp cloth before applying the next coat. Topcoat or Sealer: Apply a clear topcoat or sealer after the final coat of paint has dried completely. Choose a finish (e.g., matte, satin, gloss) that complements the paint type and desired aesthetic. Follow manufacturer’s instructions for application and curing. By mastering these painting techniques and following best practices for preparation, priming, and application, you can achieve a professional finish that enhances the beauty, durability, and longevity of your painting projects. Practice patience, attention to detail, and consistent techniques for optimal results, and enjoy the satisfaction of a beautifully painted surface that showcases your skills and creativity.
